When you run Lubuntu from a USB OS, you will be logged in automatically as default lubuntu user. We can use below command to rename it
usermod -l
It may give you below message:
usermod: user lubuntu is currently used by process
Please kill all lubuntu processes then rename lubuntu user once again, reboot the server there will be no lubuntu user exist
0
Disable default lubuntu user
1


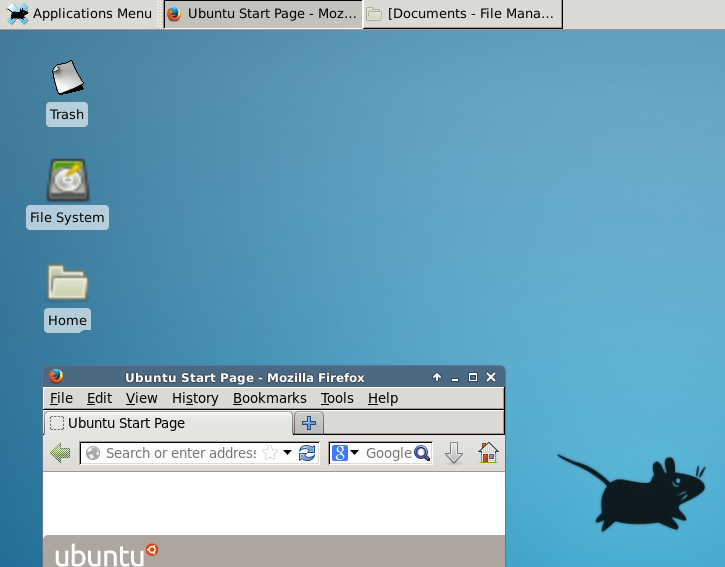
If everything is configured correctly,you should see your xfce
desktop loading and you should be able to perform you work through this
desktop environment.

xrdp shows blank screen on ubuntu 16.04
The quick solution is to install xfce4 package
Installing the xfce4 Desktop environment
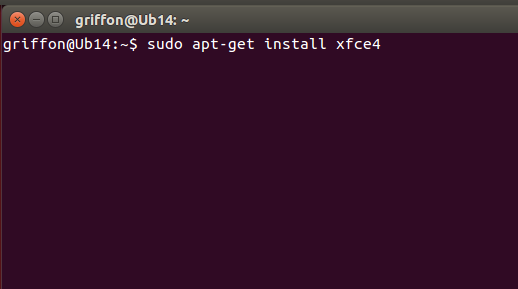
In the Terminal console; type the following commandsudo apt-get update
sudo apt-get install xfce4
Configure xrdp to use xfce desktop environment
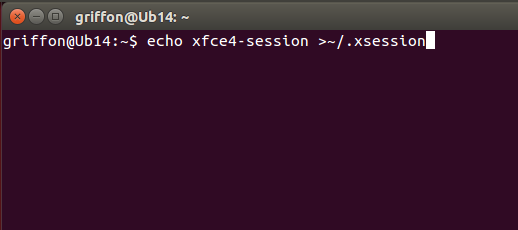
At this stage, you have to configure your Ubuntu machine in order for xrdp to know that the xfce desktop
will be used instead of the Unity or Gnome (which are not working
anymore in Ubuntu). To configure this, from the terminal console, you
will issue the following command
echo xfce4-session >~/.xsession
Restart the xrdp service by issuing the following command
sudo service xrdp restart
Test your xrdp connection
At this stage, you should have a basic
xrdp working solution. When I say basic, I mean that you can indeed
connect to your remote Ubuntu machine but if you disconnect your session
and try to connect again, you will each time open a new session. (Read
below section in this post to see how you can reconnect to the same
session)
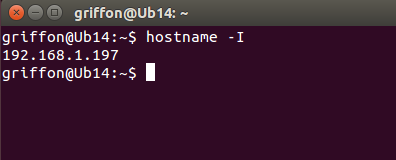
To test your xrdp solution, find the ip
address of your linux machine (or use the name if you have DNS
Infrastructure in place). To find the ip address, issue the command
hostname -I
Now go to your windows machine, start remote Desktop client and enter the ip address/name of your ubuntu machine
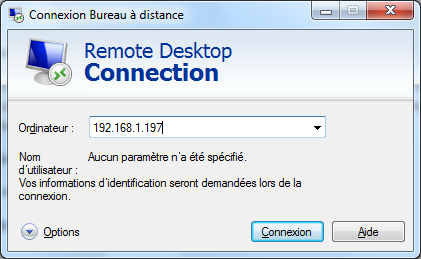
You should see then the login screen of
xrdp presented to you. Note that, at this screen (and because we have
not configured keyboard layout yet), the keyboard layout is set to English by default.

Enter your username and password and Press OK
You will see a dialog box showing the login process
Reference article: http://c-nergy.be/blog/?p=5305
0
Use the sudo apt update and then you should be able to install software as usual.
How to resolve "Sub-process /usr/bin/dpkg returned an error code (1)"
Method 1: Reconfigure Package Database
The first method you can try is to reconfigure the package database. Probably the database got corrupted while installing a package. Reconfiguring often fixes the problem.sudo dpkg --configure -aMethod 2: Use force install
If a package installation was interrupted previously, you may try to do a force install.sudo apt-get install -fMethod 3: Try removing the troublesome package
If it’s not an issue for you, you may try to remove the package manually. Please don’t do it for Linux Kernels (packages starting with linux-).sudo apt remove Method 4: Remove post info files of the troublesome package
This should be your last resort. You can try removing the files associated to the package in question from /var/lib/dpkg/info. for example the package name is "desktop-base"ls -l /var/lib/dpkg/info | grep -i desktop-basesudo rm -rf /var/lib/dpkg/info/desktop-base*Use the sudo apt update and then you should be able to install software as usual.
reference article: https://itsfoss.com/dpkg-returned-an-error-code-1/
Mailx command example
Using the mailx command
Once installed, the mailx command can be directly referenced with the name mail, so you just type in that in the command line.1. Simple mail
Run the following command, and then mailx would wait for you to enter the message of the email. You can hit enter for new lines. When done typing the message, press Ctrl+D and mailx would display EOT.After than mailx automatically delivers the email to the destination.
$ mail -s "This is the subject" someone@example.com
Hi someone
How are you
I am fine
Bye
EOT
2. Take message from a file
The message body of the email can be taken from a file as well.$ mail -s "This is Subject" someone@example.com < /path/to/file
$ echo "This is message body" | mail -s "This is Subject" someone@example.com
3. Multiple recipients
To send the mail to multiple recipients, specify all the emails separated by a comma$ echo "This is message body" | mail -s "This is Subject" someone@example.com,someone2@example.com
4. CC and BCC
The "-c" and "-b" options can be used to add CC and BCC addresses respectively.$ echo "This is message body" | mail -s "This is Subject" -c ccuser@example.com someone@example.com
5. Specify From name and address
To specify a "FROM" name and address, use the "-r" option. The name should be followed by the address wrapped in "<>".$ echo "This is message body" | mail -s "This is Subject" -r "Harry
" someone@example.com
6. Specify "Reply-To" address
The reply to address is set with the internal option variable "replyto" using the "-S" option.# replyto email $ echo "This is message" | mail -s "Testing replyto" -S replyto="mark@gmail.com" someone@example.com # replyto email with a name $ echo "This is message" | mail -s "Testing replyto" -S replyto="Mark" someone@example.com
7. Attachments
Attachments can be added with the "-a" option.$ echo "This is message body" | mail -s "This is Subject" -r "Harry
" -a /path/to/file someone@example.com
8. Use external SMTP server
This is an exclusive feature, that you get only with heirloom mailx and not bsd mailx, or the mail command from gnu mailutils or the mutt command.The mailx command can use an external smtp server to use to relay the message forward. The syntax is a bit lengthy but makes sense.
$ echo "This is the message body and contains the message" | mailx -v -r "someone@example.com" -s "This is the subject" -S smtp="mail.example.com:587" -S smtp-use-starttls -S smtp-auth=login -S smtp-auth-user="someone@example.com" -S smtp-auth-password="abc123" -S ssl-verify=ignore yourfriend@gmail.com
$ echo "This is the message body and contains the message" | mailx -v \
> -r "someone@example.com" \
> -s "This is the subject" \
> -S smtp="mail.example.com:587" \
> -S smtp-use-starttls \
> -S smtp-auth=login \
> -S smtp-auth-user="someone@example.com" \
> -S smtp-auth-password="abc123" \
> -S ssl-verify=ignore \
> yourfriend@gmail.com
For gmail specifically you would need to enable less secure apps settings before you can send mail like that.
9. Verbose - watch smtp communication
When using external smtp servers, you can choose to watch the entire smtp communication that is done in the background. This is useful specially when testing or debugging smtp servers.$ echo "This is the message body and contains the message from heirloom mailx" | mailx -v -s "This is the subject" -S smtp="smtp.gmail.com:587" -S smtp-use-starttls -S smtp-auth=login -S smtp-auth-user="mygmail@gmail.com" -S smtp-auth-password="mypassword" -S ssl-verify=ignore someone@example.com Resolving host smtp.gmail.com . . . done. Connecting to 74.125.68.109:587 . . . connected. 220 mx.google.com ESMTP je4sm32812877pbd.94 - gsmtp >>> EHLO enlightened 250-mx.google.com at your service, [122.163.43.21] 250-SIZE 35882577 250-8BITMIME 250-STARTTLS 250-ENHANCEDSTATUSCODES 250-PIPELINING 250-CHUNKING 250 SMTPUTF8 >>> STARTTLS 220 2.0.0 Ready to start TLS >>> EHLO enlightened 250-mx.google.com at your service, [122.163.43.21] 250-SIZE 35882577 250-8BITMIME 250-AUTH LOGIN PLAIN XOAUTH XOAUTH2 PLAIN-CLIENTTOKEN OAUTHBEARER 250-ENHANCEDSTATUSCODES 250-PIPELINING 250-CHUNKING 250 SMTPUTF8 >>> AUTH LOGIN 334 VXNlcmU6 >>> YmnbWFpbC5jb20= 334 UGFzcmQ6 >>> KnJgzKg== 235 2.7.0 Accepted >>> MAIL FROM:
250 2.1.0 OK je4sm32812877pbd.94 - gsmtp >>> RCPT TO: 250 2.1.5 OK je4sm32812877pbd.94 - gsmtp >>> DATA 354 Go ahead je4sm32812877pbd.94 - gsmtp >>> . 250 2.0.0 OK 1417930703 je4sm32812877pbd.94 - gsmtp >>> QUIT 221 2.0.0 closing connection je4sm32812877pbd.94 - gsmtp
Troubleshooting
In case the mails are not being delivered properly you need to check a few things. The first thing to check is that an smtp server (mta) is running locally. The netstat command can tell that$ sudo netstat -ltnp | grep 25 [sudo] password for enlightened: tcp 0 0 0.0.0.0:25 0.0.0.0:* LISTEN 2541/master tcp6 0 0 :::25 :::* LISTEN 2541/master
$ sudo dpkg-reconfigure postfix
No mails from local systems
If you try to send mails from your local computer to a gmail address, your mail would most likely be rejected, so don't try doing that.
This is because ordinary computers connected to internet address have an ip address that is not associated with any valid domain as such, and gmail strictly verifies such credentials before approving any mail to go through.
Notes and Resources
Apart from mailx, there are other tools like Swaks and smtp-cli that can be used to send mails from command line and support various features like specifying smtp servers and adding attachments and so on.However the mailx command is available in the default repositories of most common distros, so can be installed easily. Further it maintains a syntax very similar to that of the mail command which makes it a drop in replacement for the older mail command.
The mailx command is even capable of reading mails from remote IMAP servers, but that is something we kept out of this post and would talk later. To learn more check the man page for the mailx command with "man mailx".
Article source: https://www.binarytides.com/linux-mailx-command/
0
VNC to RH6.10 getting blank screen
When I use vncviewer to a Redhat 6.10 server I got blank screen.
The original xstartup file has the following content

The log has the following errors:
xterm: command not found
gnome-session: command not found
Then I installed above packages:
yum install xterm
yum install gnome-session
After I restarted vncserver, I can see desktop but no menu, no terminal window.
Then I replaced xstartup content with the following

After restart vncserver, now I have desktop + a terminal window running in it. It's all I need as I need to install Oracle from there
0
wsappx process with high cpu usage
For people who has Windows Store
Start registry editor.
Window + R , Regedit
1) Make backup of the registry
files.
2) Change
Computer\HKEY_LOCAL_MACHINE\SOFTWARE\Microsoft\Windows
NT\CurrentVersion\SvcHost
Change string entry
wsappx from
AppXSvc
ClipSVC.dll
to
AppXSvc
Notfound
Restart.
The service will not find the
correct dll, and will not start.
You will get error messages about
this that can be logged in the event viewer.
0
My home network is behind ISP NAT (damn, yes no public IP for me and also port forwarding won't work in this case), but I still want to ssh into my Linux pc at home, so how to ssh into home LAN behind ISP NAT?
Here is how, use Hamachi
First install it on your linux box:

Back to the command line
Then you need to install LogMeIn Hamachi on your remote pc (you can get the download link from your LogMeIn web login page via Networks => Deployment => Add New Link). Then click Joining an existing network after install, login with your email address (after that will send a request to your LogMeIn account for approval if you configure your Mesh network this way). Sure you will approve yourself after LogMeIn online account receive the request.
Setup Hamachi to ssh from anywhere
My home network is behind ISP NAT (damn, yes no public IP for me and also port forwarding won't work in this case), but I still want to ssh into my Linux pc at home, so how to ssh into home LAN behind ISP NAT?
Here is how, use Hamachi
First install it on your linux box:
wget https://www.vpn.net/installers/logmein-hamachi_2.1.0.174-1_i386.deb sudo apt-get install lsb sudo dpkg -ilogmein-hamachi_2.1.0.174-1_i386.deb
Back to the command line
sudo hamachi login
sudo hamachi set-nick $HOSTNAME
sudo hamachi do-join XXX-XXX-XXX
Then you need to install LogMeIn Hamachi on your remote pc (you can get the download link from your LogMeIn web login page via Networks => Deployment => Add New Link). Then click Joining an existing network after install, login with your email address (after that will send a request to your LogMeIn account for approval if you configure your Mesh network this way). Sure you will approve yourself after LogMeIn online account receive the request.